

Key Takeaways
- The compost removal process can be straightforward with the right tools and preparation.
- Breaking down the compost into manageable sections helps you remove it without hassle.
- Different compost bins require different techniques—understanding yours is key to success.
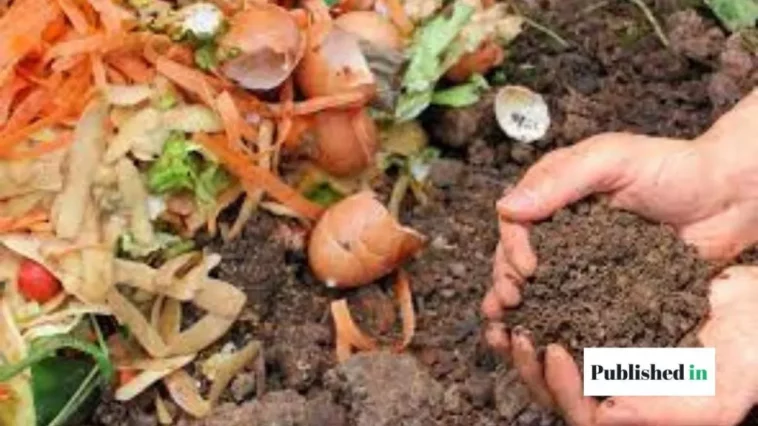
- Finished compost is dark, crumbly, and ready to be used for your garden!
- Troubleshooting common compost issues will make your compost removal process much easier.
Introduction: Ready to Remove Compost from Your Bin? Here’s How to Do It Right!
If you’ve ever opened your compost bin and stared at the pile of dark, squishy organic matter wondering where to even begin, you’re not alone. Whether it’s your first time removing compost or you’ve done it a few times before, the process can sometimes feel a bit overwhelming. The good news? Removing compost doesn’t have to be complicated, and with a little know-how, you’ll be a pro in no time.
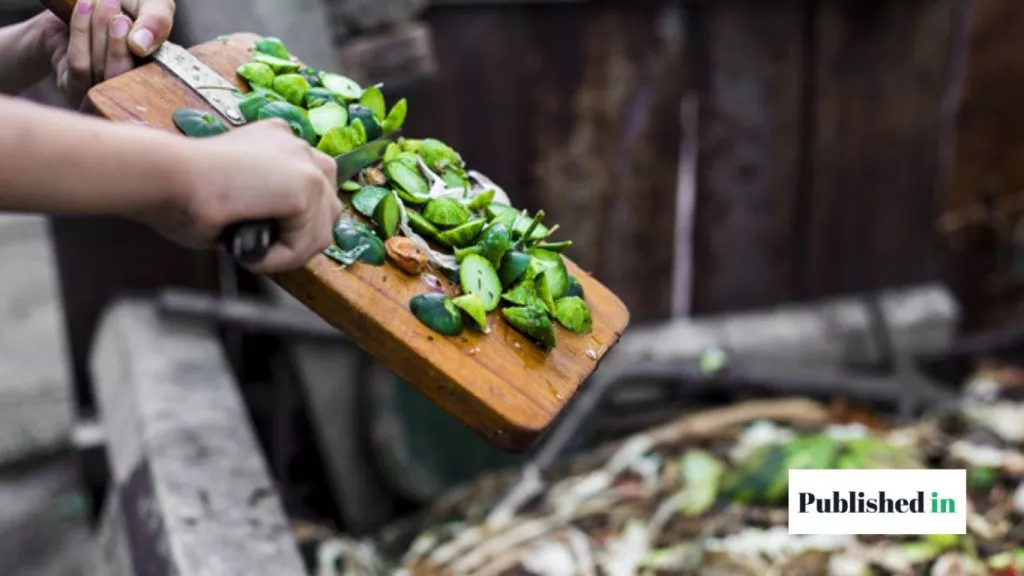
Imagine you’ve been composting for months, feeding your bin with vegetable scraps, coffee grounds, and autumn leaves. Then, one day, you notice your compost bin is brimming with rich, earthy material, ready to be removed and spread across your garden beds. But how do you get all that goodness out of your bin without making a mess, without missing any valuable material, and—most importantly—without creating a mini compost disaster in the process?
Don’t worry! I’ve been there, and I’m here to guide you through every step, so you can get your compost out and onto your garden without a hitch. Let’s dive right into it!
Preparing for Compost Removal: Gather Your Tools
Before you even think about scooping out that compost, let’s talk about the tools you’ll need. Trust me, having the right equipment can save you a lot of time and stress.
Here’s your tool checklist:
- Garden fork or shovel: A must-have for lifting and separating compost layers.
- Gloves: Compost may be natural, but it can still be a little… earthy. Protect your hands.
- Wheelbarrow or large container: You’ll need something to transport your compost from the bin to your garden.
- Tarpaulin or old tarp: Perfect for spreading compost out and preventing a mess while transferring.
- Watering can: In case your compost is too dry and needs a little hydration.
Safety Precautions to Keep in Mind
- Compost is pretty harmless, but if you’re working with a large pile, it’s always best to have a solid footing and some safety gear.
- Be careful with tools like forks and shovels—don’t rush! A little extra caution can prevent injury.
Now that you’ve got your tools, it’s time to check if your compost is ready. Spoiler alert: You don’t want to pull out your compost too soon (trust me, I’ve learned this the hard way).
Step-by-Step Process: How to Remove Compost from Your Bin
Okay, here’s the moment you’ve been waiting for—the actual compost removal process. Grab your tools, get your gloves on, and let’s get to it!
Step 1: Inspect the Compost for Maturity
Before you dive into the compost, take a moment to inspect it. Your compost is ready for removal when it looks dark, crumbly, and earthy. If there are still large bits of food scraps or recognizable items, it’s not quite done yet. The compost should smell like fresh earth—if it smells sour or like rotten food, it needs more time.
Step 2: Aerate the Compost to Loosen It Up
Compost can become a little packed together, especially if it’s been sitting for a while. So, grab your fork or shovel and give it a good stir. This will loosen things up, making it easier to remove.
Step 3: Divide the Compost into Manageable Sections
The next step is to divide the compost into sections. Don’t try to remove everything at once—it’ll be a lot easier if you break it down into smaller portions. You don’t want to overwhelm yourself or spill everything!
Step 4: Use a Shovel or Fork to Remove the Layers
Now, it’s time to get to work! Start at the top and begin removing layers of compost with your shovel or fork. Try to be gentle, especially if you want to save some of the unfinished compost for your next batch. Once you get the hang of it, it should start coming out smoothly.
Step 5: Sort Out Finished Compost from Unfinished Material
As you scoop out the compost, you’ll likely encounter some unfinished material. Don’t panic! Simply set it aside for your next composting batch. This is a common part of the process, and it’s perfectly fine.
Step 6: Handle the Compost with Care to Avoid Spilling
This might sound like an obvious tip, but it’s easy to get caught up in the excitement and end up spilling compost everywhere. Keep your compost contained in your wheelbarrow or container, and use the tarp to avoid making a mess.
Dealing with Different Types of Compost Bins
There’s no one-size-fits-all method for compost removal. The type of compost bin you use will influence how you handle your compost. Here’s how to manage the process depending on the bin type:
How to Remove Compost from a Simple Open Bin
If you have a basic open bin, removing compost is pretty straightforward. Just follow the steps we’ve already discussed, but keep in mind that an open bin may require you to dig a bit deeper to reach the bottom layers.
Removing Compost from a Tumbler Bin: What to Keep in Mind
Tumbler bins are great because they help aerate the compost, but when it’s time to remove it, you need to twist or turn the bin to get the compost out. Some models have a hatch or door at the bottom for easy removal, so be sure to check your bin’s design.
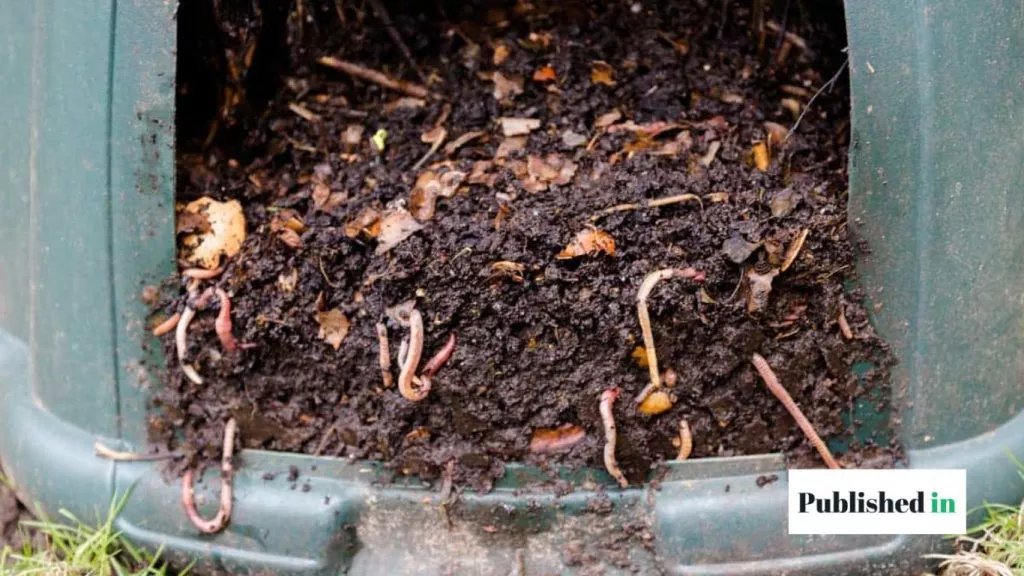
Tips for Composting with a Worm Bin
Worm bins, while awesome for composting, require more delicate handling. When you remove compost from a worm bin, make sure you’re separating the worms from the finished compost. Use a sieve or carefully sift through to ensure the worms can be put back into the system.
Common Issues You May Face During Compost Removal
Composting isn’t always smooth sailing. Here are some common issues you may run into during compost removal and how to handle them:
- Wet or sticky compost: If your compost is too wet, it will be difficult to work with. Adding more dry materials like leaves or straw can help balance things out.
- Too dry compost: If your compost is too dry and hard to scoop, a little watering can help break it down.
- Odor problems: A stinky compost pile usually means there’s an imbalance in the materials. Make sure you’re adding a good mix of carbon-rich and nitrogen-rich items.
How to Reuse or Recycle Leftover Material
Not all your compost will be completely broken down, and that’s okay. Here’s what to do with the leftover material:
- Turn unfinished compost into a new pile: Add it to your next batch and let it finish breaking down.
- Recycle scraps: Use any leftover scraps as mulch or as a base layer in your next composting batch.
Best Practices for Storing and Using Removed Compost
Once you’ve removed your compost, you don’t want to just toss it around. Here’s how to store and use it efficiently:
- How to store finished compost: If you don’t need it all at once, store it in a dry, cool area. Use it within a year for maximum nutrient value.
- Using compost in your garden: Spread a thick layer of finished compost around your garden beds, or mix it into the soil to enrich it for your plants.
Troubleshooting: What to Do If Things Don’t Go as Planned
Not every composting session is perfect, and that’s alright. Here’s how to solve some common problems you might face:
- Compost not breaking down? Make sure the moisture levels are right and that you have a good balance of green and brown materials.
- Bin too full or too empty? If your compost bin is overflowing, it’s time to start a new pile. If it’s too empty, try adding more kitchen scraps or yard waste.
Tips and Tricks for Efficient Compost Removal
Want to make compost removal even easier? Here are some quick tips:
- Keep your compost bin clean: Regularly turn and aerate your compost to keep it from becoming compacted.
- Rotate your compost regularly: By turning the compost every few weeks, you’ll prevent it from becoming too dense and difficult to manage.
Conclusion: Mastering the Art of Compost Removal
There you have it! With these simple steps, you can now remove compost from your bin like a seasoned pro. Remember, it’s all about preparation, patience, and knowing your compost bin. Once you get the hang of it, compost removal will be second nature—and you’ll have rich, fertile soil to show for it. Happy composting!
Frequently Asked Questions
- How often should I remove compost from my bin?
It’s best to remove compost from your bin when it’s fully decomposed, which usually takes between 3 to 6 months, depending on the materials and conditions. If your bin is full and you’re ready to make room for fresh scraps, it’s a good time to harvest. Just ensure the compost is dark, crumbly, and has a rich earthy smell.
- Can I remove compost from my bin in the winter?
Yes, you can remove compost in the winter, but the process may be a bit slower due to lower temperatures. If your composting process has slowed down, it’s okay to wait for warmer months. However, if you need space in your bin, you can still carefully remove compost and use it in your garden—just remember to check that it’s fully matured.
- What happens if I leave the compost in the bin too long?
If you leave compost in the bin for too long, it can become compacted and may lose some of its nutrients. The compost might also start to smell or attract pests if it’s not aerated. To avoid this, it’s best to remove your compost once it’s fully decomposed and ready for use.
- Is it necessary to separate the compost into finished and unfinished material?
Yes, it’s important to separate finished compost from unfinished material. Finished compost is dark, crumbly, and has a pleasant earthy smell, while unfinished compost may contain larger scraps or remain too moist. The unfinished material can be added back to your bin to continue breaking down.
- Can I use compost directly from the bin, or does it need to be aged?
It’s recommended to let your compost age before using it in your garden. Freshly removed compost can sometimes still contain bits of unfinished material and can be too “hot” (nutrient-rich), which might burn plants. Letting it age for a few weeks ensures it’s well-matured and safe for use.
- How do I deal with pests while removing compost?
Pests like fruit flies or rodents can sometimes be attracted to compost bins, especially if the bin is not properly sealed. To deal with pests, always close your compost bin tightly, and wear gloves while handling the compost. If you find pests in your compost, remove any food scraps that might be attracting them, and turn the pile regularly to promote airflow and discourage infestations.
Conclusion:
With these simple steps, removing compost from your bin will be a breeze. Just remember to wear gloves and break up the compost before adding it to your garden beds. By following these tips, you’ll be able to keep your garden healthy and thriving for years to come.

GIPHY App Key not set. Please check settings