

Getting your car back from a body repair shop can be an exciting experience. After all, it’s like receiving a new vehicle—well, almost. But before you hit the road and show off your freshly repaired car, there’s one crucial step you shouldn’t overlook: cleaning it. Yes, you’ve probably been told that washing your car is no big deal, but trust me, when it comes to cleaning a car after body repair, there’s a specific way to do it that can make a world of difference. In this guide, we’ll walk you through the steps to clean your car post-repair while keeping that shiny, just-out-of-the-shop look intact.
Key Takeaways:
- Proper tools and methods are essential to avoid damaging newly repaired areas.
- Cleaning your car post-repair helps maintain the finish and extends the life of the repair.
- Drying techniques matter more than you think to avoid water spots and swirl marks.
- Waxing after cleaning protects your car’s surface and restores its gloss.
- Regular maintenance is key to keeping your car looking fresh for longer.
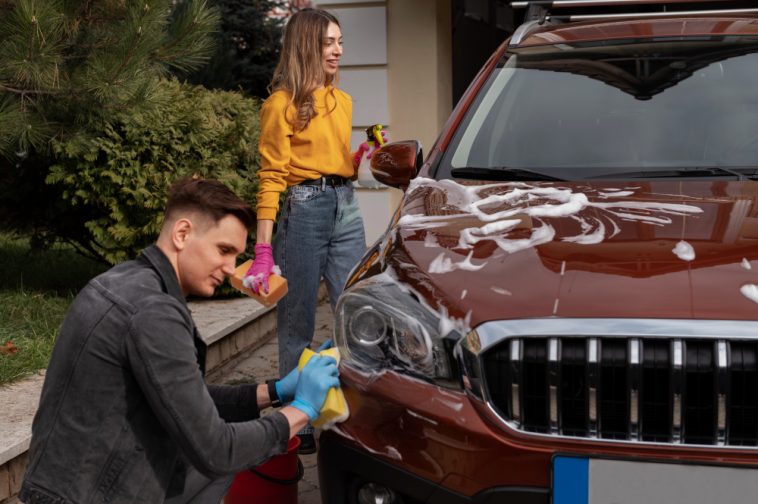
Cleaning your car after a body repair involves a few important steps: gently rinsing it, washing it with care, drying it to avoid water spots, and then applying wax for protection. The right tools and techniques will not only help keep your car looking great but will also preserve the repair work, ensuring your vehicle stays in top condition.
Why Cleaning Your Car After Body Repair is Essential
Picture this: You’ve just gotten your car back from a body shop, and it’s looking like a million bucks. But here’s the thing—your work isn’t finished just yet. After body repair, your car is more sensitive to harsh chemicals, abrasives, and even water droplets that could leave behind unsightly marks. Cleaning it the wrong way could undo all that work the professionals just put in.
When you clean your car after a body repair, it’s not just about making it sparkle. It’s about protecting that new paint job, preserving the repairs, and ensuring the work done lasts as long as possible. A fresh coat of paint or a repaired dent deserves proper care to prevent damage and keep that “new car” feeling alive.
Preparing for the Clean-Up: Essential Tools and Products You’ll Need
Before you dive into cleaning your car, it’s essential to gather the right tools and products. Think of it like prepping for a big project—you wouldn’t try to build a house without the right equipment, right? Same goes for cleaning your freshly repaired car.
The Basics of Post-Repair Car Care
Here’s a list of what you’ll need for the job:
- Car Wash Soap: Avoid using dishwashing detergent—it’s too harsh and can strip away protective coatings. Invest in a gentle, pH-balanced car wash soap.
- Microfiber Towels: These are your best friend for drying the car without leaving scratches or lint.
- Gentle Car Brush: A soft-bristled brush helps dislodge dirt without harming the paint.
- Detailing Kit: This should include things like a soft sponge, detailing clay, and brushes for hard-to-reach areas.
- Car Wax: After the cleaning process, a good coat of wax is a must to protect the paint.
Step 1: Rinsing Your Car Thoroughly – The First Key Step to Cleanliness
Alright, let’s get started with the basics. The first thing you want to do is give your car a nice, thorough rinse. This might sound simple, but trust me, it’s more important than it seems.
Why Rinsing is Crucial
When you rinse your car, you’re doing more than just splashing water around. You’re loosening up the dirt, debris, and any leftover particles from the body repair process. By getting rid of this surface-level grime, you’ll be setting yourself up for a much smoother cleaning process.
- Use a gentle stream of water to avoid any pressure that could harm the newly repaired areas.
- Don’t forget to rinse under the wheel wells and around the tires. A lot of dirt hides in these places.
Step 2: Washing the Body – Cleaning the Post-Repair Surface with Care
Now that your car is rinsed, it’s time to break out the soap. But here’s the thing: washing a car after body repair is not like washing any old vehicle. You’ve got to be extra careful around the repaired areas, as they’re more sensitive.
Gentle Washing Methods for Post-Repair Cars
Here’s how to wash your car without doing any damage:
- Two-Bucket Method: This method is your secret weapon. One bucket for soapy water, the other for rinsing the sponge or mitt. This helps avoid any dirt from going back onto the car and scratching the surface.
- Soft Sponge or Mitt: Use a soft sponge or mitt to wash the car. It will catch dirt better and be gentler on the surface than a regular cloth.
- Be Extra Careful Around Repaired Areas: Don’t scrub hard over the freshly painted spots or repaired panels. Treat these areas with extra caution to avoid rubbing away any paint or sealant.
Step 3: Drying the Car – Preventing Water Spots on the Newly Repaired Areas
If you’ve ever washed your car and left it to air dry, you know what happens: those pesky water spots. After a body repair, leaving water on your car for too long is a no-no, especially on new paint.
Proper Drying Techniques
Here’s how to dry your car without leaving a trace:
- Microfiber Towels Are Your Best Friend: They’re gentle, absorbent, and will leave your car spot-free. Use them to gently blot and dry the surface instead of rubbing, which can cause swirl marks.
- Chamois Cloths: If you have one, use it for an extra-dry finish. They’re perfect for getting into tight spots, like around mirrors or windows.
Step 4: Inspecting and Touching Up the Repair Areas
Now that your car is clean and dry, it’s time to give it a quick inspection. Look over the repaired areas closely for any imperfections, like leftover residue or faint scratches.
How to Perfect the Repair Areas
If you spot any small imperfections, here’s what you can do:
- Buff the Areas: Use a soft microfiber cloth to buff the area gently. This helps remove any smudges or fingerprints left from the repair process.
- Polish the Paint: A little bit of polishing can go a long way to restore the car’s shine. Just be sure to use a gentle, non-abrasive polish.
Step 5: Waxing and Protecting Your Car’s New Look
Here comes the fun part—waxing! After all your hard work cleaning and inspecting your car, waxing is the finishing touch that seals in the shine and protects the newly repaired areas.
Why Waxing Is Important
- Protection Against the Elements: Wax acts as a shield, protecting your car from UV rays, dirt, and water spots.
- Restores Gloss and Shine: Wax gives your car a glossy, just-polished look.
- How to Apply Wax: Use a clean, soft cloth to apply a thin layer of wax in a circular motion. Let it dry, then buff it out with another clean microfiber towel.
Bonus Tips for Long-Term Care After Body Repair
Cleaning your car after a repair is just the beginning. To keep it looking great, here are a few long-term care tips:
- Regular Washing: Don’t wait too long between washes. Keeping dirt and grime off your car regularly will help preserve the finish.
- Avoid Harsh Chemicals: Be careful with strong chemicals and cleaners—they can damage the paint.
- Protect from Road Debris: Consider using paint protection film or car covers to protect the surface from rock chips and other debris.
Conclusion: Enjoying Your Restored Car – The Final Touches
Cleaning your car after body repair is more than just a chore—it’s an essential part of keeping it looking as good as new. From a thorough rinse to the final coat of wax, each step plays a role in protecting the repairs and ensuring your car stays beautiful for the long haul. So take your time, enjoy the process, and give your car the attention it deserves.
Frequently Asked Questions
It’s best to wait at least 24-48 hours after the repair to allow the paint and other materials to fully cure before cleaning. Always follow the body shop’s advice on timing.
No, regular dish soap can strip away protective layers and damage the finish. Always use a pH-balanced car wash soap specifically designed for automotive surfaces.
It’s recommended to wax your car every 3-6 months, depending on the climate and how often you drive.
If you spot imperfections, like small scratches or leftover residue, consider polishing the area with a non-abrasive polish. If the issue persists, contact your repair shop for a touch-up.

GIPHY App Key not set. Please check settings